Thursday, June 26, 2014

FITtastic Friday | It's Not A Diet -- It's A Lifestyle

http://www.bing.com/images/search?q=diet&FORM=HDRSC2#view=detail&id=2C610264A5D248F9683D625010189069E983A5D9&selectedIndex=8
"I can't eat that-- I'm on a diet!"
"What diet are you on?"
"I want to do that diet ___ celebrity did it!"
"Oh, you aren't eating fruit? What diet is that?"
"Lose 15 pounds in 10 days on ___ diet -- it really works!"

How many times have we heard one, if not all, of those questions from our friends, family, and social media?
Too often.

Nowadays, people tend to lean towards a "quick fix" to reach their weight loss goals or food problems which then leads them toward a FAD diet. A FAD diet stands for "fast acting diet" -- not a long lasting one. Throughout my entire life the word "diet" always had a negative connotation to it. Before you ask, I was never put on a diet as a kid because of my weight. My Mom never used it, therefore we never used it. As I got older and I was able to form my own opinion I realized that I, personally, did not like the term either.

From middle school - high school, to now, I always heard friends say they were doing "such and such" diet with their Mom and they couldn't eat "xyz". I can remember distinctly going home and telling my mom that I was going to do that diet. She would say not to go on a diet, just make smarter choices. Like always, she was right.

Don't get me wrong, I've done "diets" here and there, but nothing ever stuck. I couldn't wrap my head around the concept of I wasn't going to do this forever then what was the point? People recently have approached me about "What diet are you doing?" and "How much weight have you lost?"... etc. To be frank, I hate the term diet -- I 100% hate it. I think it sets people up for failure without even given them a chance. It gives the dieter unrealistic standards to meet, that they ultimately will not meet and then fail. For example, if the diet you are on says you cannot eat any carbs whatsoever, and you slip up and eat a carb, what is your normal reaction? 9 times out of 10 it's "well, I messed up today -- I'll just start over tomorrow". This can turn into a continuous cycle and that leads to abandoning the diet + the new lifestyle as a whole. For me, being healthy and this blog isn't about sharing my "diet" with the world, it's focusing on my health + trying to become the healthiest person I can be. I firmly believe that if you eat good 75% of the time, it's okay to "treat yo self" and eat that hot dog at the party or a burrito from Taco Bell. But what can come back to bite you is if you let the "treat yo self" eating turn into 75% of your lifestyle and the healthy the other 15%... believe me, I would know.

You're probably thinking well, there's controversy about being Paleo -- what makes you think that that isn't a diet and isn't good for you? You're right, people do consider it the Paleo diet. But I'm not some people, I don't eat bacon for every meal and I eat bread from time to time. I strive for "Paleoishness" because it gives me a set of guidelines [to a certain point because every Paleo person has different opinions about what is Paleo + what isn't]. But I like how strong, clean rejuvenated my body feels when I follow it. It's not that I am never going to eat pasta, bread, or cheese again, that's would be unrealistic and I'm Italian -- we love our cheese, it's just I am striving to cut back on things I have finally realized our hurting my body. It's about cutting back and enjoying what you love on a smaller, more healthy scale. I promise you can do it! Because if I can, you can.

My goal with this post is not to sound rude or disrespectful. But to hopefully make people question the way they think about living a healthy lifestyle. Is the diet you are on the best for your body? Are you getting the necessary nutrients your body needs? I want girls to realize that there is no set weight you're supposed to be, size you're supposed to wear or body shape you're supposed to have. It' about being the best version of yourself you can be + loving yourself.

Eating healthy doesn't have to come at a price, you can eat healthy and delicious foods every day and still meet your goals. No one is perfect, and you are going to make mistakes, but it's how you handle those set backs that really shape you into a stronger person. What I have found that works best is to set small, monthly goals for yourself -- it can be anywhere from 1 - 10 goals, however much you are willing to take on and try each day to achieve something you didn't the day before.

Since it is FITtastic Friday [+ I haven't done one in a very long time] and as nerve racking as it is, I've decided to truly share my fitness journey with you all.
On Monday, I began the crazy 6 week program of the CHAARG Booty Camp and I've decided to have you guys along this journey with me + to hold me accountable.
This is my before picture. My FitGoal I set for myself is to see definition in my abs by the end of the program and to stick to being "Paleo"ish throughout the program!

This post is a bit more serious than normal, but I've had it in "the blogging vault" for a while and thought it was the right time to throw it out there.

FITtastic Friday Workout from the CHAARG Booty Camp:
Warm up:
1 mile [or 10 minute] walk, jog, or run

Workout:
Repeat 2X
*Rest 20 seconds between each round
Round 1 || 60 sec Jump Rope + 20 Eagle Sit Ups
Round 2 || 60 sec Jump Rope + 20 Bicycle Crunches
Round 3 || 60 sec Jump Rope + 20 Flutter Kicks
Round 4 || 60 sec Jump Rope + 20 Reverse Crunches
Round 5 || 60 sec Jump Rope + 20 Vertical Crunches
Round 6 || 60 sec Jump Rope + 60 sec Plank
Round 7 || 60 sec Jump Rope + 20 Oblique Raises [each side]
Round 8 || 60 sec Jump Rope + 20 180 Planks
Round 9 || 60 sec Jump Rope + 20 Hundreds [1 up + down with arms = rep: complete 100 reps for a full set]
Round 10 || 60 sec Jump Rope + 20 Hip Twists

Extra Burn:
Repeat 4X
*Measure out 10 yards
10 Russian Twists | Sprint 10 yards
10 Core Destroyers | Sprint 10 yards
10 Reverse Bicycles | Spring 10 yards
10 Ground Runners | Sprint 10 yards


That's all I have for today! Hope everyone's Friday is going great : ) 

             Have a fit + fantastic day! 


Disclaimer: The workout above is not my creation nor do I claim I made it up -- CHAARG and Share It Fitness collaborated on this workout + it is amazing!


Watermelon Cake + JOJO's GIVEAWAY Winner!

We've all heard that expression, "Have your cake, and eat it too!"
This recipe is literally the perfect example of this... literally.

About a week ago a few friends of mine and I started doing a "Tuesday Supper Club Night" -- every Tuesday we head over to my friend Ellie's apartment to make appetizers, dinner, and dessert together! Last week Vic decided to make a Watermelon Cake -- I had seen this on Pinterest many times before but honestly didn't know how I felt about it and if I would even like the taste of it... wrongo, it was delicious.

Never judge a cake by its icing.
Or its Cool Whip for that matter.
 
Before we started making it Vic told us that this cake was one of the biggest  "Pinterest Fails".
Oh great, thanks for the confidence boost.
 
Ingredients:
1 large seedless Watermelon
3 cups Lite Cool Whip
2-3 Kiwi (peeled and sliced)
1/4 cup Blueberries
1/4 cup Raspberries
3/4 cup sliced Almonds (we used Coconut flavored -- HIGHLY recommend)
 
Directions:
1. Grab a large baking pan + grab your watermelon. Begin by cutting the two ends of the watermelon, allowing it to stand on its own.
 
2. Next, shave the sizes of the peeling " like a turkey" so there is no green or white left on the "cake" ; )
*If we are saying this is cake might as well go with it right?
3. After peeling the Watermelon it should look like this (picture below). Begin icing the Watermelon with the Cool Whip.
*We placed ours in the freezer for a little while because the Watermelon was starting to drip. We put it in for about 20 minutes  to allow the Cool Whip to harden to the cake. I also read somewhere that patting the sides dry with a paper towel will help allow the Cool Whip to stick better!
4. While we waited for the Cake to harden, we began washing and preparing the toppings. We used Blueberries, Kiwi, Raspberries and Coconut Flavored Almonds. But you could use any fruit or nuts you like!

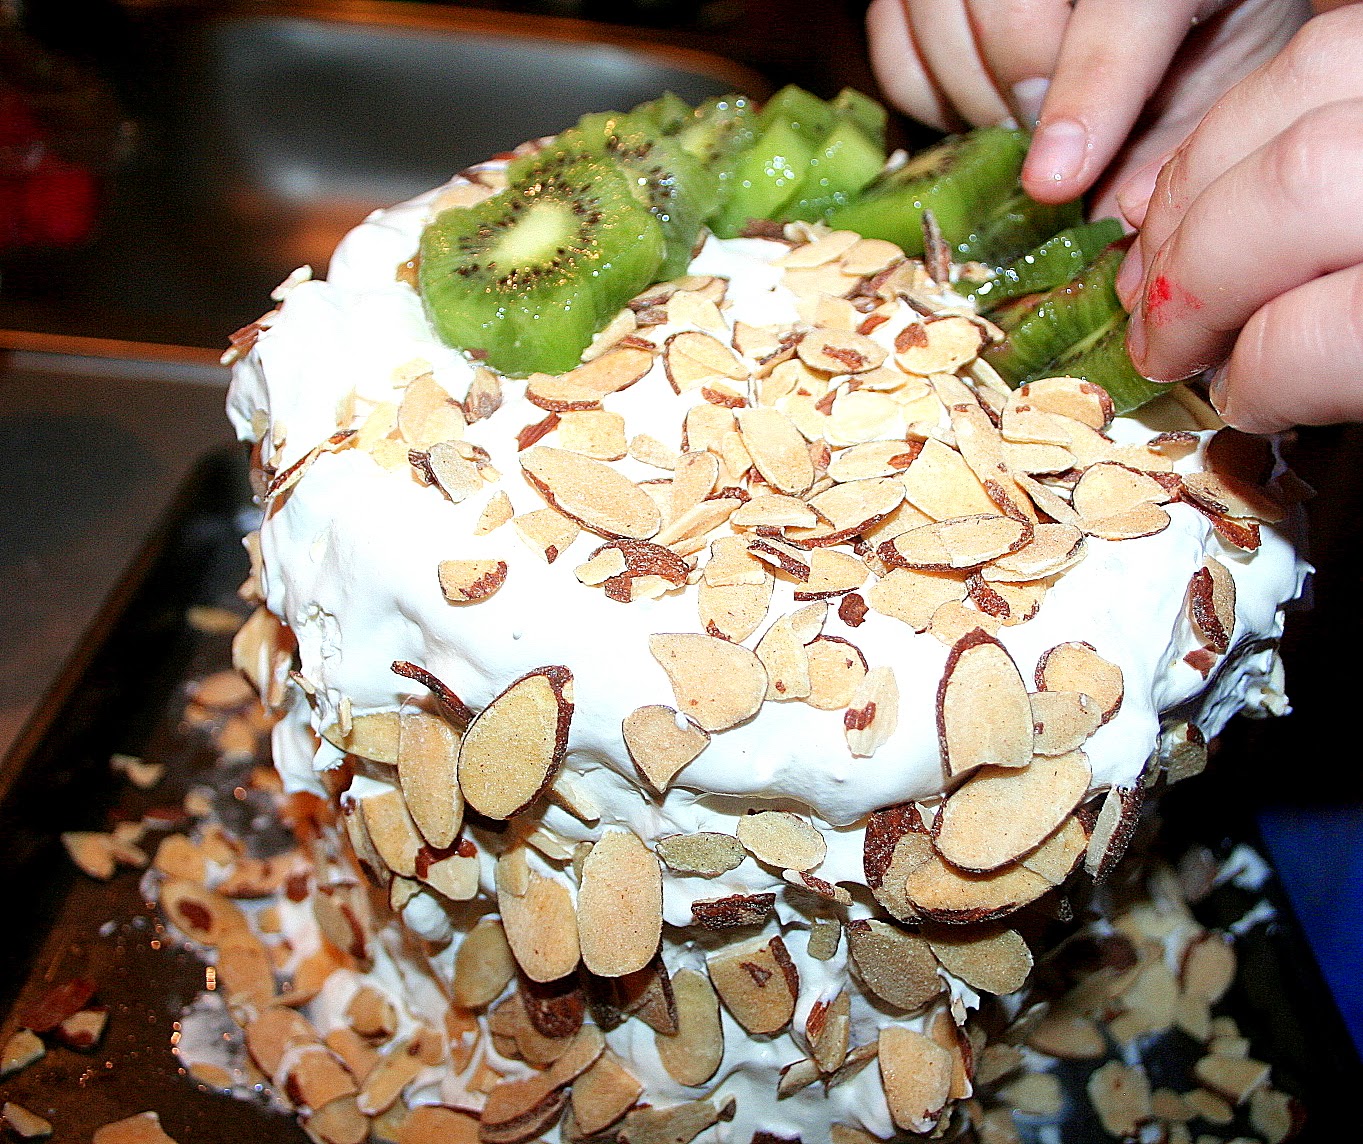
5. Once the cake hardened for a little while, we pulled it out and finished icing it. Once we were done we quickly threw [yes, threw] the Coconut Almonds on the cake.
*This was difficult because we did not want to touch our hands all over the cake. I read in one recipe that she had precut the cake and was able to hold it and coat the outside with the Cool Whip then roll it in the almonds -- smart idea!

6. Next came the toppings! Vic was in charge of this and I was the sue chef! I would say it turned out quite fancy if I do say so myself!

 6. After we placed all of the toppings on the cake we placed it back into the freezer for about 15 minutes. We did not want the fruit to slide off because of the juice from the Watermelon so putting it in the freezer helped it set.
*As you can see, one blueberry is mid nose dive in the picture...

7. Then, devoured it.
My piece was massive and so delicious. I was a little skeptical about how it was going to taste with the Cool Whip stacked on fruit, then stacked on more fruit, but it turned out amazing! Definitely NOT a Pinterest fail!

If you're looking for something fun and exciting to bring to a party, hmm...maybe a Fourth of July Party? This would be the perfect, refreshing healthy snack to bring + no one will expect you to cut it and see a watermelon #surprise! Oh, but don't leave it outside in the heat... that would be a Pinterest Fail.

Nutrition per Serving (1 slice):
260 Calories, 45.1g Carbs, 9g Fat, 5g Protein
*Recipe makes about 8 Servings
 
  
And now for the JOJO's Chocolate Bark GIVEAWAY Winner! Congratulations to...
Hannah Miller, who won 10 servings of JOJO's Chocolate Bark! You have been emailed about your prize!
Enjoy! : )
 
Hope everyone's morning is brighter than it is outside... please let this rain go away!
 
Have a fit + fantastic day, rain or shine!
 
 
*Disclaimer: The JOJO's Chocolate products were sent to me as a promotional item for my review. I love the products anyway and was more than happy to promote them on my blog. I received no compensation and my opinions are mine and mine alone.  

Wednesday, June 25, 2014

Avocado, Garlic Hummus + A Super Sweaty Workout!

I don't know what got into me yesterday, but I completely owned my workout...
If I would have been wearing a grey hooded sweatshirt, you would have mistaken me for Rocky.

Yesterday was Day 2 of the CHAARG BOOTY CAMP and the workout for yesterday was an intense 5k HIIT workout [HIIT stands for High Intensity Interval Training]. I honestly don't think I would have gotten through the workout without the right fuel, say hello to Avocado, Garlic Hummus!


This workout had me sweating glistening and here's how it went!
Warm Up:
Repeat 4X
High Knees
Criss Cross Jumps
Line Jumps

Workout:
5 Yard Sprints x 25 || Get in sprinter's stance, sprint, turn around -- walk back. Rest 5 seconds then repeat.

Four Point Runs x 10 || Set up four points in a square 8 yards apart. From Point 1 to Point 2 shuffle sideways. From Point 2 to Point 3 run backwards. From Point 3 to Point 4, shuffle sideways and from Point 4 to Point 1 sprint forwards. Rest 20 seconds, then repeat.

High Knee Runs x 10 || Set up two points, 20 yards from each other. Run with high knees from Point 1 to Point 2 -- turn around then run back [that equals one repetition]. Rest 10 seconds, then repeat.

5K HIIT || Using the Nike+ Running App log your distance throughout the 5K. Walk .05 miles then sprint .05 miles. Repeat until you have completed 2 miles total. Then jog 1 mile!

Let's just say Cabela and I got our butts kicked -- but we loved it! It was the perfect day for Cabela to run with me, it had been raining for a few hours so the pavement was cool and it actually felt good for a summer evening in Louisiana!

Cabela particularly enjoyed the sprinting... sprinting through the puddles that is. He ran around like a crazy beast, running and splashing, then rolling around -- I have never seen him like that before! I actually completely stopped sprinting and just laughed at him and to take his picture...
Now time for the recipe!

Ingredients:
2 Avocados (halved, seeded and peeled)
2 cloves Garlic (peeled and chopped)
1 large can Chickpeas (drained and rinsed -- thoroughly)
3 TBSP Olive Oil
1-2 TBSP Crushed Red Pepper
1-2 TBSP Cumin
1 TSP Garlic Salt
1 TSP Onion Powder

Directions:
1. Drain and rinse caned Chickpeas and place in food processor.
*Rinse them a lot, a lot, a lot, there is tons of juice and peelings that are at the bottom of the can that you do not want that in your hummus! Trust me. Rinse until the water coming from the can is clear and has no color.

2. Place Garlic cloves in food processor along with Chickpeas, scooped Avocado, Garlic Salt, 2 TBSP Olive Oil, Cumin, Red pepper flakes, and Onion powder.
*I was going to put lemon or lime juice in this but was completely out. If you have that I would add the juice of 1 lemon or lime, whatever your preferences for an added zest!
3. "Blend, baby blend -- hummus inferno" [get it?] until smooth and creamy!
*Looking back now I think I could have done this faster [and made it smoother] by blending the Chickpeas and the Avocado separately or by using an immersion blender!  
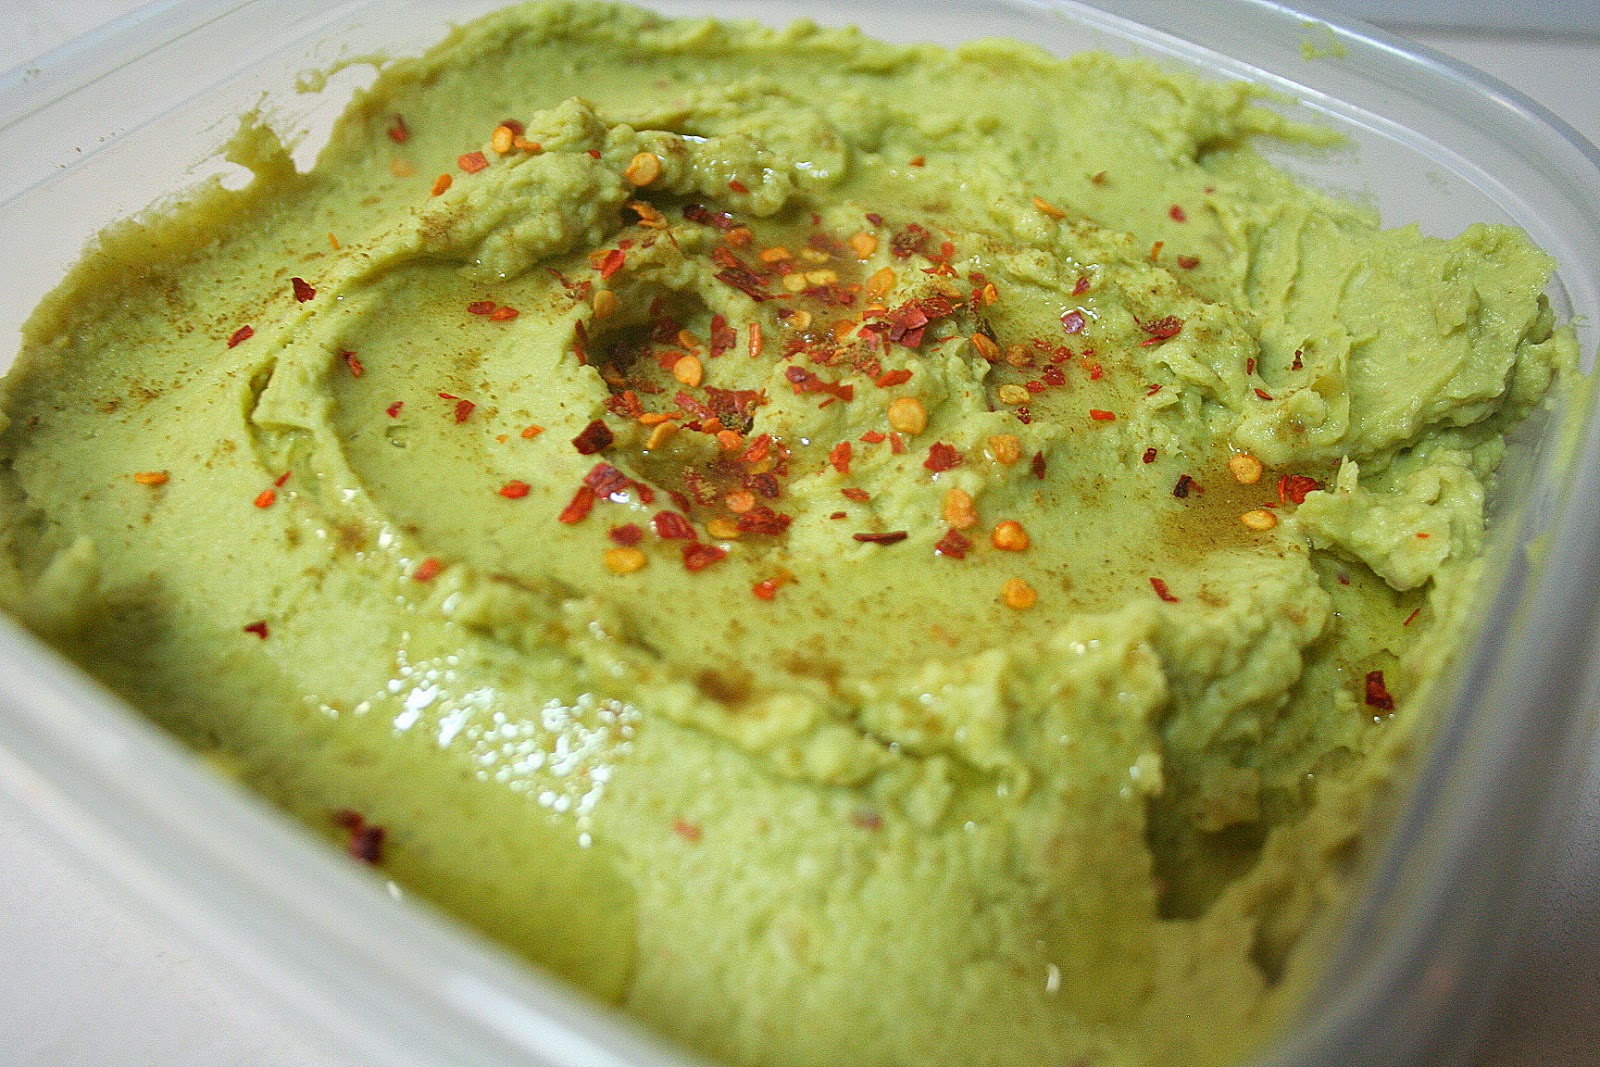
4. Once blended store in an airtight container, or get a spoon and go to town!
*I topped mine with 1 TBSP Olive Oil, Red pepper flakes, a pinch of cumin. When I brought it for lunch yesterday, I added a pinch of cayenne pepper and garlic salt for added spice, I'm all about the extra kick.
P.S. Do not be alarmed if you got to eat it the next day and it is not as green as when you first made it. Because of the Avocados it will start to brown, like when you make guacamole and go to eat it the next day. It tastes just fine but is not as pretty!
This is definitely going to be my go to pre-workout fuel and definitely a recipe I plan to play around with. This snack had the perfect amount of carbs to hold me through my workout and a great amount of good fats from the avocados!
 
Nutrition per Serving (about 2 large TBSP): 
174 Calories, 13.1g Carbs, 13.6g Fat, 3.4g Protein
*Recipe makes about 6-8 servings
 
 
That's all I have for today -- now I'm off to continue my day of hobbling around as a consequence trophy of yesterday's workout [can't. feel. my. legs.] + prepare for todays workout!
 
Have a fit + fantastic day!


Idea for this recipe adapted from here. 
Disclaimer: The workout above is not my creation nor do I claim I made it up -- CHAARG and Share It Fitness collaborated on this workout + it is amazing!

Tuesday, June 24, 2014

Spicy, Red Wine Spaghetti Squash - A Guiltfree Italian Feast

I like wine and food.
Put them together and I'm one, happy camper.
 
You guys have probably figured out I like things spicy. I cannot even count how many posts I have posted with the word "spicy" in the title.
 
This one, is obviously no different. Thank you to Giada De Laurentiis for creating this recipe.
Of course, I never leave well-enough alone and had to change it up for the better.
And I nailed it [*insert self high-five]

Yesterday was the first day of the CHAARG Booty Camp and it hurt so good. It was a 1 hour bodyweight Sweat Sesh full of challenges. After the workout I planned on making this recipe but realized I definitely wanted to add meat to it. My coworker, Mollie, brought this in for lunch last week and I just had to try it.
It was incredible -- so if you want to completely ignore me + this post, just make the recipe the way Giada made, go right ahead! Won't bother me one bit [okay, maybe a little bit...]
 
The second I tasted I new I wanted to try to make it healthy! The recipe called for 1lb of spaghetti noodles -- that's where majority of the calories come from!
So I made a big switcheroo to nix those added cals!
Say hello to my beautiful, beautiful friends, spaghetti squash.
 
Honestly, I think I took more pictures of the squash than I did of the actual meal. I just cannot get over how cool of a vegetable this is.
If you have never had spaghetti squash I highly suggest it. No, it does not taste JUST like pasta but it will fill you up without weighing you down and satisfies the craving, and... it's Paleo. [fist pump]
Ingredients:
2 medium Spaghetti Squash
1/2 bottle Zinfandel Red Wine
4 ounce crumbled Goat Cheese
1 lb Lean ground beef (I used venison)
1/2 cup Marinara Sauce
1 TBSP Olive Oil
1 TBSP Butter
1/4 cup Fresh Parsley
1/4 cup chopped Green Onions
2 Garlic Cloves (diced)
3 TBSP Rep Pepper Flakes
1 TSP Garlic Salt
Salt + Pepper to taste

Directions:
1. Preheat oven to 375. Slice each squash in half - "hot dog style".

2. Using a spoon, scoop out the seeds and "insides" of the squash. Throw them away!

3. Place the squash, facing up, on a baking sheet and throw in the oven for 35-40 minutes (or until tender enough to pierce and scrape with a fork).
*Towards the end it was taking a little while longer than I wanted so I turned the heat up for about 400 to cook faster. Make sure you watch them, so they do not burn, because that would be sad.

4. While the squash is cooking, using a large saucepan combine 1 TBSP Olive Oil + chopped green onions + diced garlic + 1 TBSP Red Pepper. Sautee until Green Onions are tender and Garlic is fragrant.

5. Next, place the ground meat in the sauce pan and cook thoroughly. Add 1/2 cup of marinara sauce and 1 TSP Garlic Salt for added flavor.
*The original recipe called for tomato paste, and for once in history of my entire life we were out of it [gasp]. We happened to have some of my Gran's "red gravy" on hand, so I used that in place of the tomato paste! If you have neither, regular marinara sauce would work just fine!

6. Once the Spaghetti Squash is cooked and tender let cool -- seriously, let it cool! (I was way to excited to I powered through the pain, but I wish I hadn't!) While the squash cool, place 1/2 bottle of Zinfandel in the saucepan and let simmer (allowing the wine to cook down) -- about 5-7 minutes.

7. After the Squash has cooled it's time to make it into "Spaghetti". Using a fork, begin scraping the insides (starting closest to the peeling and moving towards the middle) towards the middle until you begin to see "noodles".
*This is a hard concept to explain by typing so here is a video in case you get confused!

8. Now, using a large pot, turn on HI heat. Place 1 TBSP butter (to keep the squash from burning + who doesn't love butter?) and 1/8 cup of wine to the bottom of the pot. Allow butter to melt and wine to bubble.

9. Now that you have your "spaghetti" transfer it + the "wine/meat" mixture into the larger pot.Mix in the remaining red pepper flakes and mix well. Allow the "spaghetti" to absorb the wine (about 5-10 minutes). Make sure to constantly stir so it can absorb.
 10. After about 10 minutes, remove the heat, add Goat Cheese + Parsley, mix, serve & ENJOY!
*If you are not a fan of Goat Cheese, I feel sorry for you. (Just kidding...but really) You can always substitute the goat cheese for parmesan, feta or any other kind of cheese that sounds good to your taste buds!
*Garnish with extra parsley on top for show!

I have now found my greatest guilty pleasure of all time. Seriously I think I may go buy 7 Spaghetti Squash and make a giant batch to eat forever and ever. The end.

You may think this does not look very appetizing and why is she having a panic attack over this, but it was amazing. I actually ate a bowl of it for lunch and was opening licking the bowl. Openly-- without shame.

And here's the thing. You don't have to feel guilty about eating this. Seriously. This isn't like that feeling after you leave Olive Garden haven eaten 5 breadsticks, 2 buckets of salad, and a large Chicken Marsala AND a dessert (which I may or may not have done before).
While I was eating this I kept thinking to myself about how I had completely blown my day of eating, but then I added up all of the Nutrition facts and I was blown away! This is the perfect meal to make when you are craving something sinfully delicious, but without the extra guilt that comes along with it. And the tight pants, that's not fun. For anyone.

Therefore, I ate seconds of this.
And loved every minute of it.
And so did my pants.

Nutrition per Serving (about 1 cup)
268 Calories, 12.8g Carbs, 10.6g Fat, 17.5g Protein
*Recipe makes about 5 servings


Have a fit + fantastic day -- Enjoy!

Monday, June 23, 2014

Buffalo Chicken Lettuce Wraps - Under 300 Calories!

My sister and I are notorious for being unbelievably, unapologetically (*pun intended) obsessed with Buffalo Chicken...
Madison may be worse than me.
No matter where we go, she order's Buffalo Chicken -- I am not that to that extent, but last week I was craving it so I had to cure the craving -- the health (and still extremely delicious) way!
Lettuce Wraps are some of my favorite things. It's like a salad -- that you can hold in your hands! Fun fact : did you know that you can swap the bread for a lettuce wrap just about anywhere? Even Five Guys does it! I've seen these lettuce wraps all over Pinterest so I figured they would be perfect to cure my Buffalo Chicken craving.

Let me start off by saying that
1] Peter had no idea what "Buffalo Chicken" was... that's crazy, right?
2] Once I told him what it was he said he had never had it.... EXCUSE ME?
3] He asked me to explain what it tasted like! I mean... it tastes like buffalos?

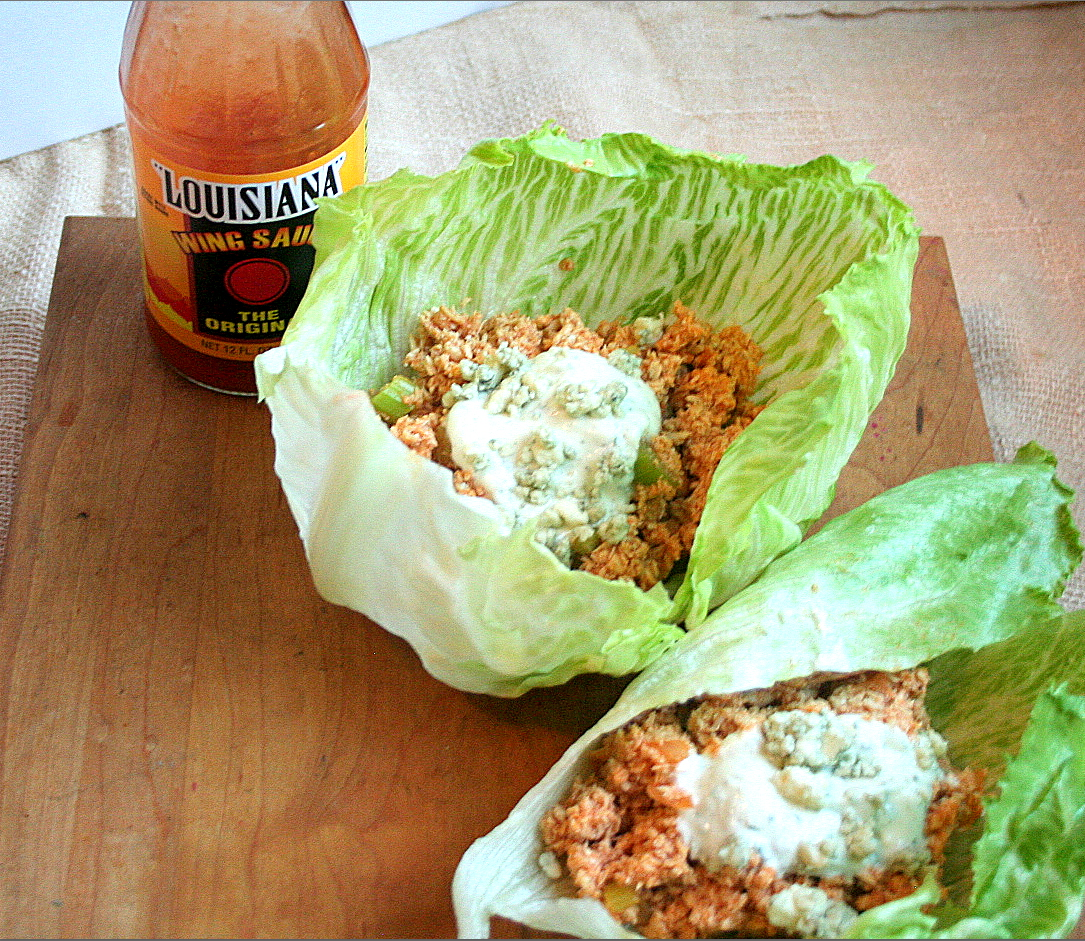
Majority of the reason I made this recipe was because when I went to the store that week I came across a bottle of the "Louisiana" Wing Sauce and couldn't pass it up!
Ingredients:
4 large Boneless, Skinless Chicken Breasts
1/2 Iceberg Lettuce Head
3/4 cup Louisiana Wing Sauce (any wing or buffalo sauce should work)
1/4 cup Worcestershire Sauce
1 TBSP Garlic Powder
1 TSP Onion Powder
1/2 White Onion (chopped)
1/3 cup Celery (chopped)

For the topping
1.5 TBSP Ranch Dip Mix
2 TBSP Blue Cheese Crumbles
2 TBSP Non-fat Plain Greek Yogurt

Directions:
1. In medium sized saucepan, on HI heat, combine chopped onion with Worcestershire sauce and sauté until onions are tender and fragrant or almost translucent.
2. Next, cut Chicken Breasts into medium sized cubes. Cook in saucepan combined with onions + Worcestershire sauce. Season with Garlic Powder and Onion Powder. Cook Chicken thoroughly -- until there is no pink.

3. Once Chicken is cooked place half of the batch into a food processor. Shred the chicken by using the pulse button, about 4-5 pulses (about 10-15 seconds). Do the same for the second half of the Chicken.
*If you do not have a food processor you could manually shred the chicken using a fork and knife.

4. Return shredded Chicken to medium saucepan on Medium Heat. Mix in chopped celery and "Louisiana" Wing Sauce mixing well so it does not burn. Continually stir -- for about 3-4 minutes or until meat and sauce is heated throughout.
5. Once Chicken mixture is completed -- it's time for the toppings (takes less than 1 minute to make)Take 2 large TBSP of Non-Fat Plain Greek Yogurt + mix with 1.5 TBSP of Ranch Dip Mix. Stir well.

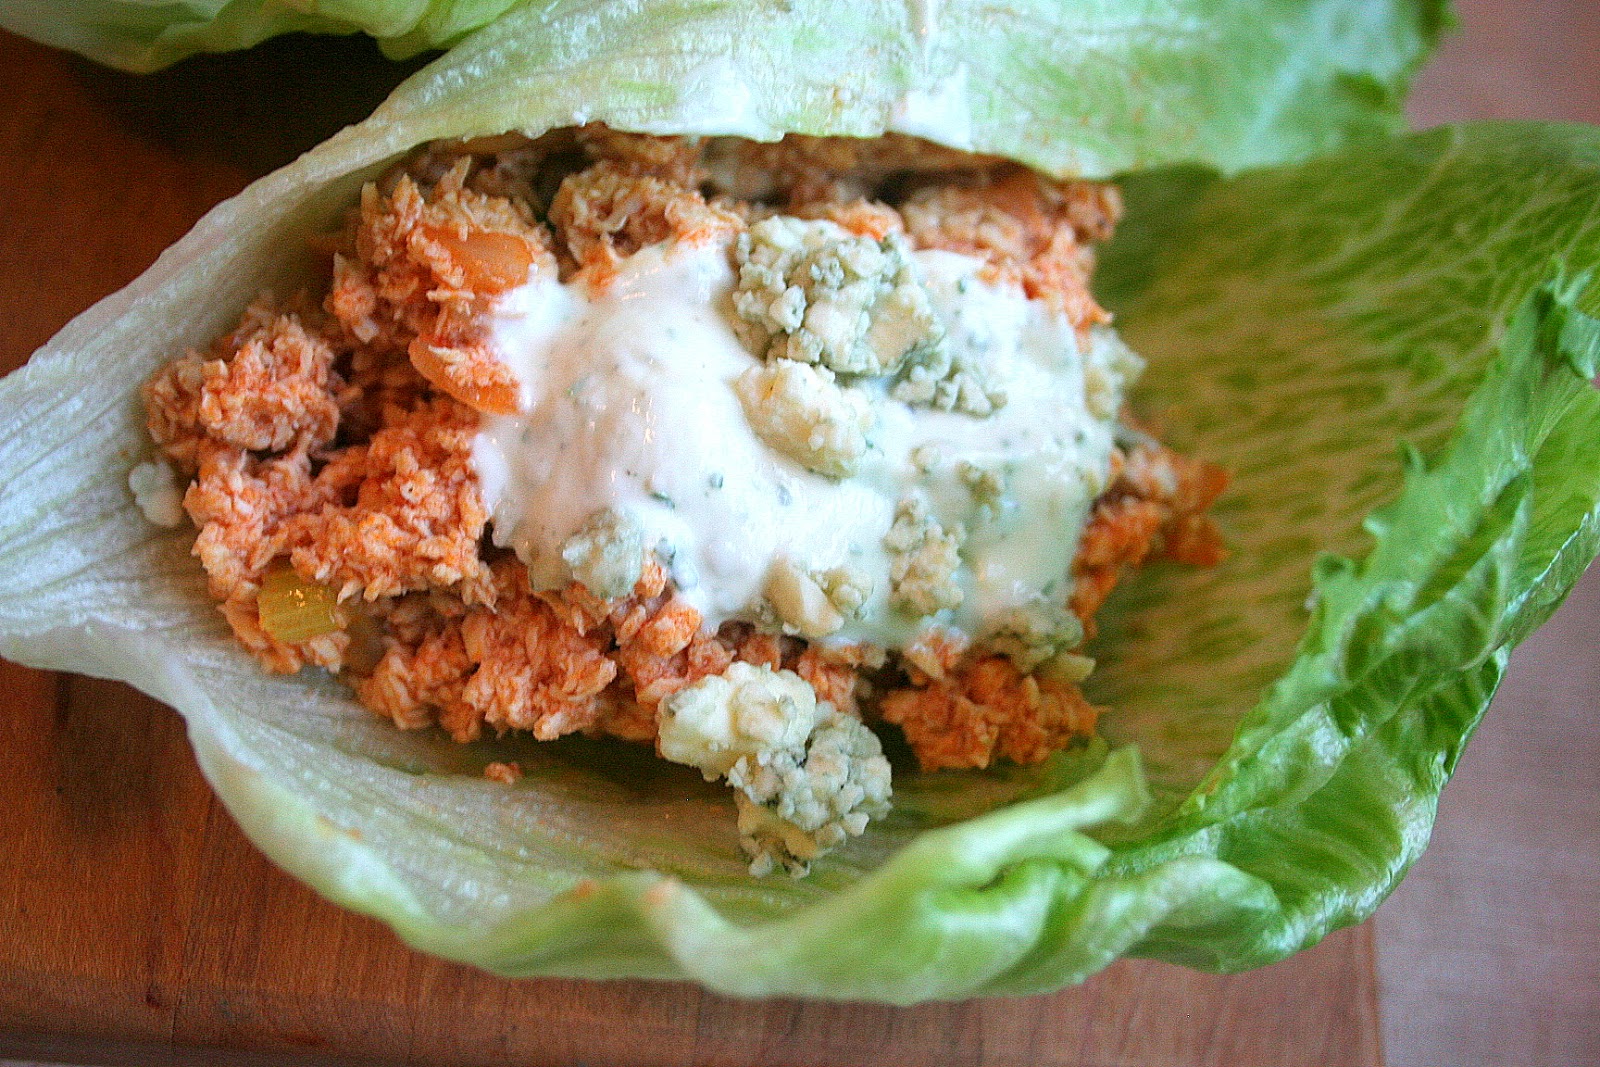
6. Gently "unwrap" the "wrap" from the lettuce head. Place about 1/2 cup mixture into each wrap topping each lettuce wrap with about 1 TBSP "Ranch" and about 1 TBSP Blue Cheese Crumbles.
7. Have a fire extinguisher ready (it'll be hot) and enjoy!

This recipe is very spicy, but not unbearable! My Dad and I enjoyed it but added a little "Woo"ing from time to time + "hand fanning"! If you do not want the extra spice use less wing sauce!
The thing I love about this recipe is how great the flavor and texture was! It was an extremely filling dinner and the cool lettuce + ranch + blue cheese really offset the spiciness, but not too much. It was incredible!
Other great thing -- this is super skinny recipe! 2 large, filling lettuce wraps are less than 300 calories and less than 6g of fat! BOOM!
Try going to a wing place and getting that -- it just won't happen!

This recipe made 8 large servings and could be used in so many different ways:
- Buffalo Chicken salad with Greek Yogurt Ranch "dressing"
- Stuff it in a pita pocket for a delicious sandwich
- Sautee some vegetables and eat it alongside the meat

The possibilities are endless! What will you come up with : )

Nutrition per Lettuce Wrap *with toppings
143 Calories, 7.4g Carbs, 5.1g Fat, 18. 1g Protein
*Recipe makes 8 - 1/2 cup servings
 
Nutrition per Lettuce Wrap *without toppings
103 Calories, 6.5g Carbs, 3.1g Fat, 13.6g Protein
 
 
That's all for me today-- Enjoy the spice!
Have a fit + fantastic day!
 

Thursday, June 19, 2014

JOJO's Chocolate Bark : GIVEAWAY

Good Morning Everyone + Happy Thursday!
 
Today we have another exciting thing happening on the blog -- a GIVEAWAY!
And it's the best kind of giveaway....
http://www.jojoschocolate.com/
A chocolate giveaway... + it's Paleo friendly ; )  
 
Say hello to JOJO's Chocolate, the absolute love of my life.
Hi, JOJO's nice to meet you!
 
Now that we are all introduced, let me tell you the story about how we met (it's actually quite romantic...)
 
I came across JOJO's Chocolate Bark through another blogger and entered into a giveaway she was doing! Well, I didn't win -- but I knew I had to try this product out (+ knew JOJO's and I were a match made in heaven... chocolate heaven) and reached out to them and they were more than excited to work together!
 
After I tried the product I knew I had to let you guys in on this amazingness... it's that good!
I first talked about JOJO's in my post here and ranted and raved out it! I just love how fresh and natural their product is and how it isn't flavored bark, you can actually see the ingredients they put into it!
http://unapologeticfitnessfoodie.blogspot.com/2014/05/back-at-it-paleo-days-sweaty-workouts.html
Oh, did I mention it only has 5 ingredients?
Yes! So simple + delicious
Ingredients: Dark Chocolate, Raw Almonds, Raw Pistachios, Cranberries, and all Natural Gnarly Whey Protein.
 
Each serving (1 ounce) is only 152 Calories, 10g Carbs, 11g Fat, and 4g Protein! And it's so filling. It's the perfect afternoon snack to keep you energized, full so you don't end up craving something extremely fattening!
You can actually see how homemade the bars are... honestly it looks like a little chocolate elf whipped this up and sent it right to you for your to enjoy! 


You guys know I LOVE companies who strive for the best no matter what! This is one of those companies.  JOJO's  motto is "Cure the craving!" and their main goal is to serve their consumers something that will help them stay motivated and reach their fitness goals! They also pride themselves on using very little sugar and possess the ability to cure anyone's hankering chocolate cravings!  
 
While I was writing this post I was looking through their website and found this. And I LOVE that they have this -- it truly shows you how much they strive to be better than any other "chocolate company" out there.
I know for me this was super eye opening to me! I would 100% rather eat a product I can see the ingredients + are more natural!
And of course while I was taking pictures I couldn't resist... so I took a bite! AHH I love this stuff, honestly, I do and I cannot wait for one of you guys to be able to try this stuff and understand why!
Okay let's get to this giveaway! This GIVEAWAY is going on from Today until June 25th so you've got tons of time to enter + spread the word!
 
One lucky reader will get 10 servings -- aka 10 days worth of chocolate bark (but you must. restrain. self. from. eating. all. at. once.) delivered right to your door!
 
This giveaway is going to be very similar to my Erin Condren Giveaway but I would love to add a little more excitement to this one + engage you guys more! So when you comment with your name + email I'd love to hear why you guys love chocolate! Be creative -- I want to hear it all! I absolutely love reading comments on posts! : )
 
Here's how you enter!
1. Complete the mandatory parts of the giveaway entry below!  
2. For added points towards your entry, you can subscribe to my blog here!
3. Comment on this post with your Name + Email to verify your entry! 
4. When you comment tell me why you LOVE chocolate! : )
  
 
Good luck everyone! I know you guys will absolutely love this chocolate so stay tuned!
I will announce the WINNER on Thursday morning (June 26th)!
 
 
Have a fit + fantastic day!


*Disclaimer: The JOJO's Chocolate products were sent to me as a promotional item for my review. I love the products anyway and was more than happy to promote them on my blog. I received no compensation and my opinions are mine and mine alone.

Wednesday, June 18, 2014

Skinny Spicy, Chicken Enchiladas!

I could eat Mexican food everyday, anytime, anywhere, for the rest of my life and you'd never hear a word of complaint from me. No sir, not ever.  
 
But... I've come to learn that Mexican food isn't that great for you... like, at all.
 
So, I decided I'd changed that!
I whipped up this quick + easy Spicy Chicken Enchilada recipe in my head while I was day dreaming of chips and queso at work one day!
The most amazing part? It only has 120 calories and 3g of fat per Enchilada!
 
Enchilada?
En-Chi-lata?
Aint-Cha-lata!
"Ain't-cha-gonna-wanna-eat-a-lotta" -- oh you're gonna wanna eat alotta this! ; )
120 calories per serving...that is just unheard of when it comes to Mexican food! Most enchiladas have 300 calories per serving (1 Enchilada) and over 10g of fat!
 
Eh... no thanks.

This recipe was very easy and only took 35 minutes to cook and the prep work took about 20 minutes -- depending on how fast you roll those tortillas!

Ingredients:
5 Boneless Skinless Chicken Breasts
24 Corn Tortillas
1 cup Fiesta Cheese Blend
4.5 ounces Low Fat Cream Cheese
4 ounces Non-Fat Plain Greek Yogurt
1 jar of Verde Salsa
1 can Enchilada Sauce (Hot)
2 cans Rotel Canned Tomatoes with Green Chiles (Mild)
2 small cans Green Chiles (the size of about half a can)
1 packet Old El Paso Zesty Sour Cream Mix
1.5 TBSP Cilantro (dried)
1 TBSP Garlic Powder
1 TBSP Onion Powder
1 TBSP Cayenne Pepper

Directions:
1. Preheat oven to 350 degrees. Cut Chicken breasts into medium sized cubes. In large sauce pan cook chicken on high heat. -- I seasoned my chicken with sprinkles of Cilantro, Garlic Powder, Onion Powder, tiny bit of pepper and a splash of Worcestershire sauce.
*I barely seasoned the Chicken because I was going to add the real spice later into the mixture!

2. After the chicken is cooked thoroughly (no pink + smells amazing), place in food processor and pulse until shredded evenly.
*I did this in 2 batches because my food processor is not very large.

3. Next, combine shredded Chicken, Cream Cheese, Greek Yogurt, 1.5 cans Rotel, 2 cans Green Chiles, Zesty Sour Cream mix, Cilantro, Garlic Powder, Onion Powder and Cayenne Pepper! Mix well!
*The picture was just so pretty with the seasonings on top -- but I stirred it all together after : )

4. Next, take your corn tortillas (I used small ones) and place 2 TBSP of the Chicken mixture into the center of the tortilla. Roll and place in a greased baking dish.
*My recipe makes 24 hearty enchiladas and could not all fit in the same dish -- I used a smaller baking dish as well that is not shown in the pictures.
5. Top with 1 large jar of Verde Salsa (I used 3/4 on the larger dish and the other 1/4th on the smaller dish). Evenly top with 1 can red Enchilada Sauce (hot). Then, evenly sprinkle with 1 cup Fiesta Blend cheese across both dishes! I used the last half can of Rotel on top + a little of the juice for an added kick!
*PS -- I used 1 cup cheese total, not 1 cup per dish!
6. Place in the oven for 35 minutes or until cheese is melted and sauce is bubbling on the sides!
*About 15 minutes in I pulled the dishes out and sprinkled with dried Cilantro leaves for aesthetic appeal and I LOVE cilantro! Then put the dishes back in!
 
7. Let cool for 5-10 minutes + Enjoy your sombrero-wearing-self!
This recipe, to say the least, was ginormous hit with my family. My Mom is actually the one in the family who is famous for her Enchiladas + my sister loves them.

After the first bite Madison said, "Well... these get second place. Mom's are still 1st..." [I think she was just sucking up to my Mom to be the favorite child ; ) ] after 5th bite --  "... okay actually, you can make these anytime.."

Two days later Madison says -- "Morgan, when are you making those enchiladas again...?"
Yeah, 24 enchiladas only last about a day and a half in this family -- remember they were healthy and I may or may not have eaten 4 of them on the first night I made them... ; ) (which was still under 500 calories for a dinner!)
 
This dish was super quick, cheap and was packin' the heat -- temperature heat that is! And I think I got the consensus that this is an overall crowd pleaser! Here's how I know -- Peter AND my Dad liked them and asked for me to make them again! But, I told them it had Greek Yogurt in it they looked confused and then said "Oh well -- when are you cooking again?"

Nutrition per Enchilada:
120 Calories, 15g Carbs, 3.3g Fat, 7.3g Protein
*Recipe makes 24 Enchiladas


Hope everyone is having an awesome Hump Day + stay tuned because tomorrow we have another GIVEAWAY coming to the blog!


Have a fit + fantastic day!